OpenNebula is an Open Source Management tool that helps Virtualized Data Centers oversee private clouds, public clouds and hybrid clouds. OpenNebula combines existing virtualization technologies with advanced features for multi-tenancy, automated provisioning and elasticity.

Installing OpenNebula Front-end on Ubuntu 18.04
I assume that you already have a running instance of this operating systems, this can be a virtual machine or a physical server.
Note: Until the Installation Completes Don't change any passwords while installing. Proceed with the Passwords which I given.
Step 1: Install and Configure MySQL Database (Skip the Step if already Maria DB Installed in Your Machine)
The MySQL/MariaDB back-end is an alternative to the default SQLite back-end. The two back-ends cannot coexist (SQLite and MySQL), and you will have to decide which one is going to be used while planning your OpenNebula installation.
Uninstalling Current Version of MariaDB server:
$ sudo apt-get remove mariadb-server
To install MariaDB 10.4 on Ubuntu 18.04, Need to add MariaDB repository in your system.Step 1.1: Install Software-Properties-Common if missing:
$ Sudo apt-get install software-properties-common
Note: While Installing / Updating any Packages the Error will Occur like E: Could not get lock /var/lib/apt/lists/lock - open (11: Resource temporarily unavailable) E: Unable to lock directory /var/lib/apt/lists/

To Avoid these type of Errors Use the Following Commands:
$ ps -A | grep apt
$ sudo kill -9 13431
$ sudo rm /var/lib/dpkg/lock
$ sudo rm /var/lib/apt/lists/lock
$ sudo rm /var/cache/apt/archives/lock
Step 1.2: Import MariaDB gpg Key:
Run the command to add Repository Key to the System
$ sudo apt-key adv --recv-keys --keyserver hkp://keyserver.ubuntu.com:80 0xF1656F24C74CD1D8
Once the PGP Key is imported, proceed to add repository URL to your Ubuntu 18.04 Server:
$ sudo add-apt-repository "deb [arch=amd64,arm64,ppc64el] http://mariadb.mirror.liquidtelecom.com/repo/10.4/ubuntu $(lsb_release -cs) main"
Step 1.3: Install MariaDBThe Final Process is Installation of MariaDB Server
$ sudo apt-get update
$ sudo apt -y install mariadb-server mariadb-client
Step 1.4: Check whether the MariaDB is Installed or Not
Run the following command.
$ sudo mysql -u root -p
It will ask for Ubuntu Password followed with MySQL Password. MySQL Password is initially empty so Just Press Enter.For Example:

Step 1.5: Once MariaDB is installed and running, create a database and user for OpenNebula.
$ mysql -u root -p
> CREATE DATABASE opennebula;
> GRANT ALL PRIVILEGES ON opennebula.* TO 'oneadmin' IDENTIFIED BY '12345678';
> FLUSH PRIVILEGES;
For Example:

Step 2: Add OpenNebula and Debian Repositories
Run the following commands to add epel and OpenNebula repositories on Ubuntu 18.04.
Debian / Ubuntu
Import Repository Key:
$ wget -q -O- https://downloads.opennebula.org/repo/repo.key | sudo apt-key add -
$ echo "deb https://downloads.opennebula.org/repo/5.6/Ubuntu/18.04 stable opennebula" | sudo tee /etc/apt/sources.list.d/opennebula.listStep 3: Install Opennebula-Frontend Package
Install all OpenNebula packages by running the commands:
$ sudo apt update
$ sudo apt install opennebula opennebula-sunstone opennebula-gate opennebula-flow
Step 4: Ruby Runtime Installation.
Some OpenNebula components need Ruby libraries. OpenNebula provides a script that installs the required gems as well as some development libraries packages needed.
$ sudo /usr/share/one/install_gems
You’ll get a prompt asking you to select OS and confirm.
Press Enter to Start the Ruby Installation.
Step 5: Configure OpenNebula DB
Then open the file oned.conf and edit to add MySQL db settings.
$ sudo gedit /etc/one/oned.conf
For Example:Uncomment the following line:DB = [ BACKEND = "sqlite" ]to#DB = [ BACKEND = "sqlite" ]Then add:DB = [backend = "mysql",server = "localhost",port = 0,user = "oneadmin",passwd = "12345678",db_name = "opennebula" ]

Now Login to MySQL DB Using Oneadmin as User
$ mysql -u oneadmin -p
For Example:
Step 6: Starting Opennebula
Step 6.1: Configure Oneadmin Credentials
The /var/lib/one/.one/one_auth fill will have been created with a randomly-generated password. It should contain the following: oneadmin:<password>. Feel free to change the password before starting OpenNebula.
For example:
$ sudo cat /var/lib/one/.one/one_auth
oneadmin:dugVuigwipp3

Step 6.2: Change Password of Oneadmin
If you want to Change the Password, do the following.
$ su - oneadmin
$ echo "oneadmin:mypassword" > ~/.one/one_auth
This will set the oneadmin password on the first boot. From that point, you must use the oneuser passwd command to change oneadmin’s password.
Note: Sometimes you may get an Authentication Failure. To resolve that check the below Example.

Step 6.3: Configure Firewall (UFW)
Check the UFW Status whether you have an Active UFW Firewall. Need to allow specific ports required by OpenNebula.
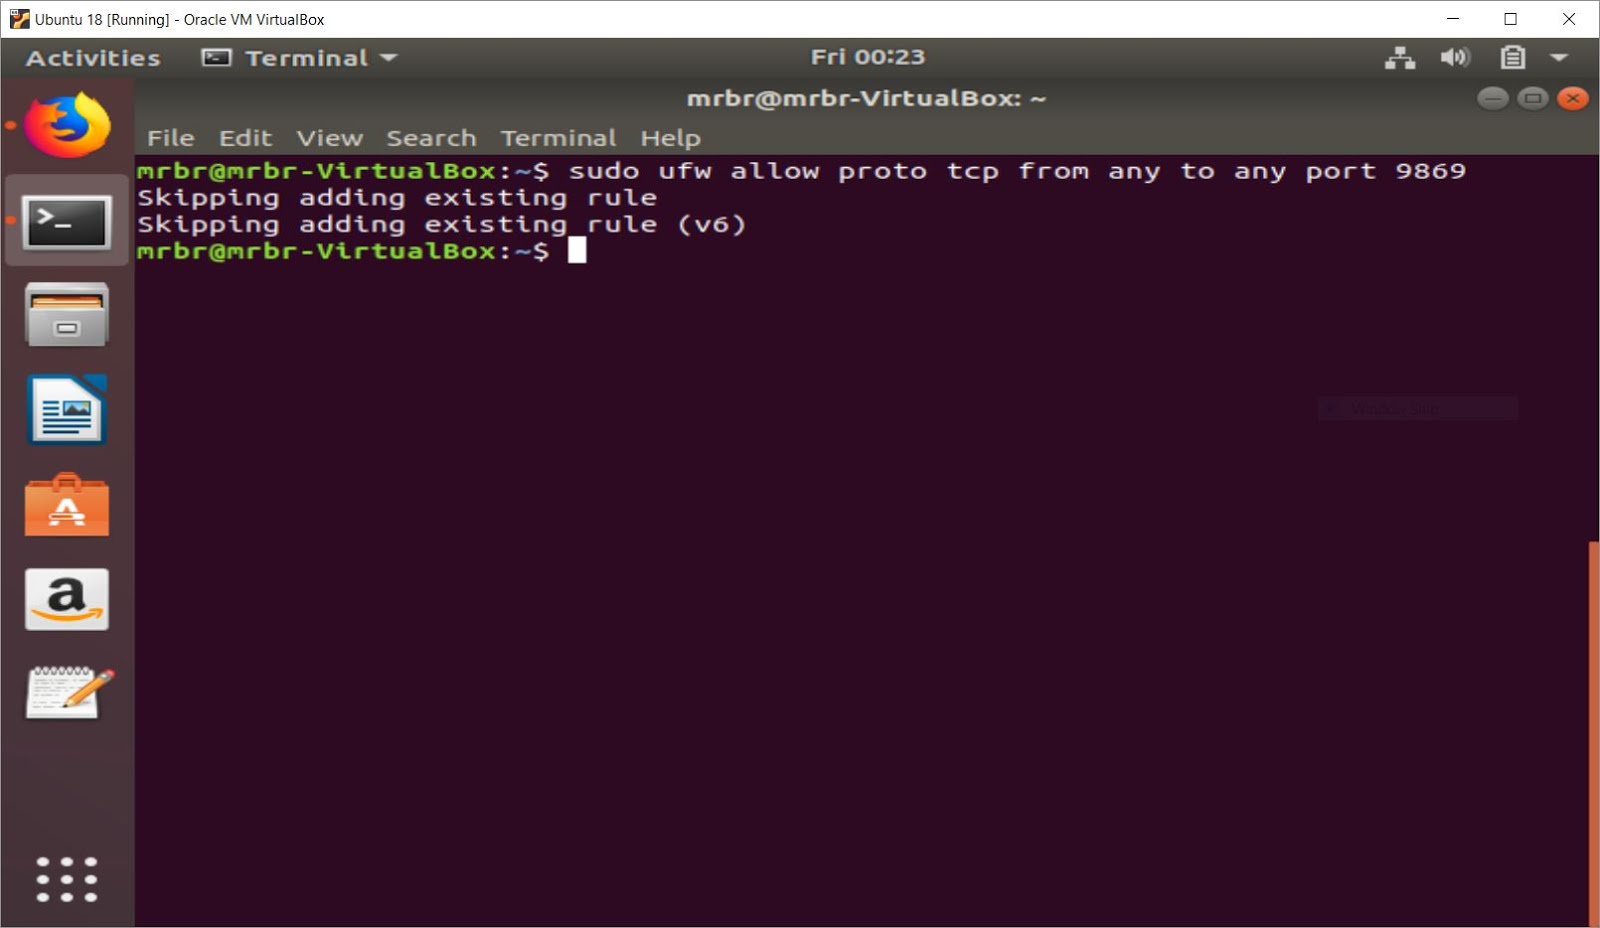
Note: In Some machine while running OpenNebula it will show SSH Port Error. To Set Up a Firewall with UFW Refer the Below Link. [Skip if No Error Occurs ]
Refer: https://www.digitalocean.com/community/tutorials/how-to-set-up-a-firewall-with-ufw-on-ubuntu-16-04
Step 6.4: Start OpenNebula Daemons
You are ready to start the OpenNebula daemons. You can use systemctl for Linux distributions which have adopted systemd:
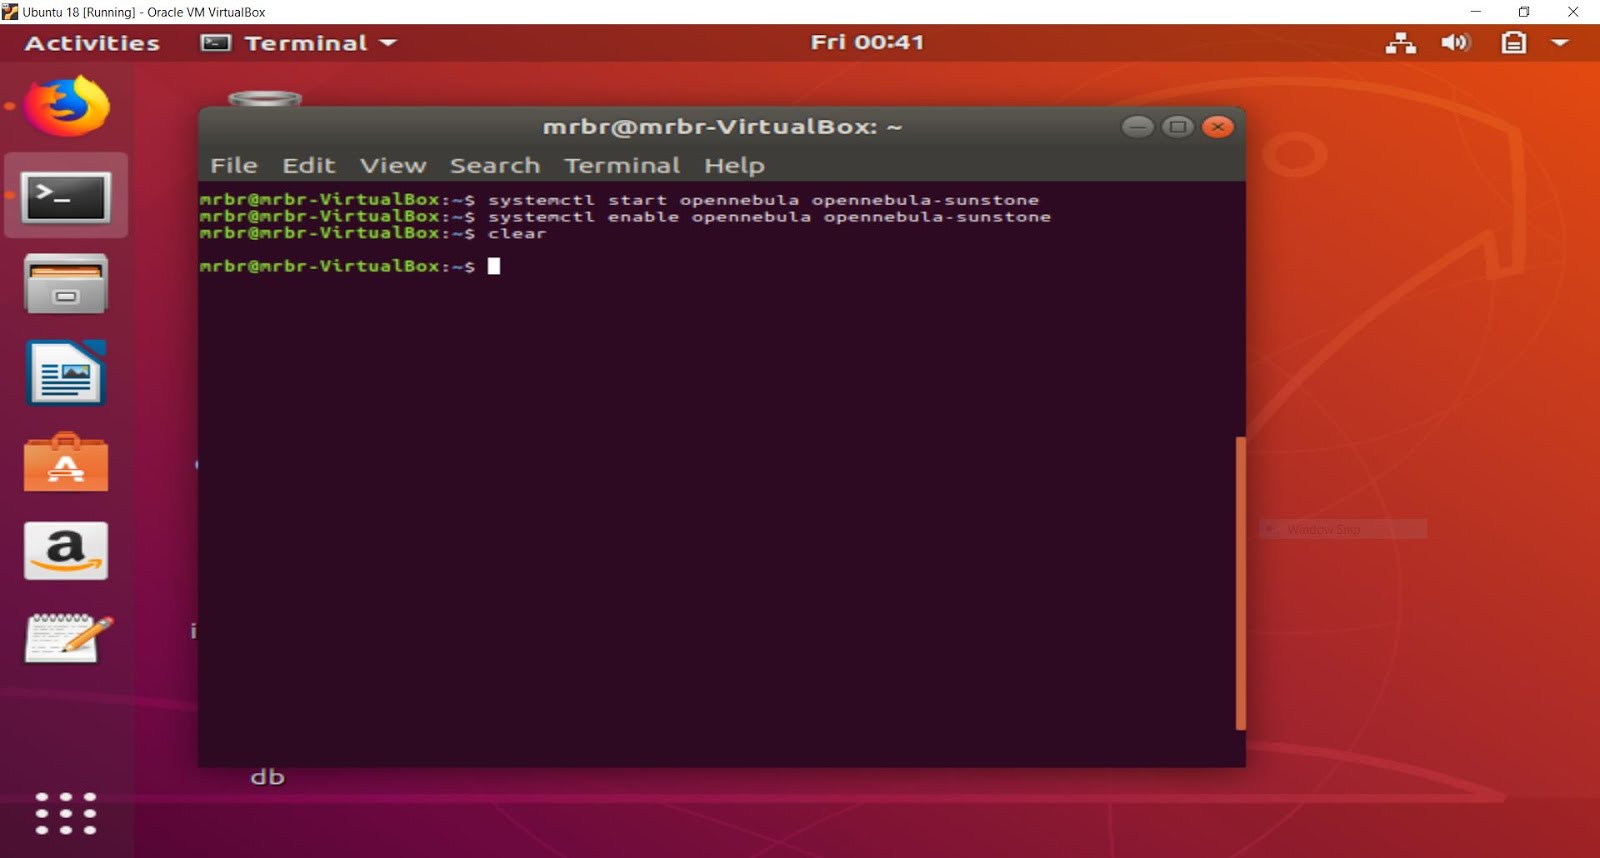
Step 6.5: Verify the Installation
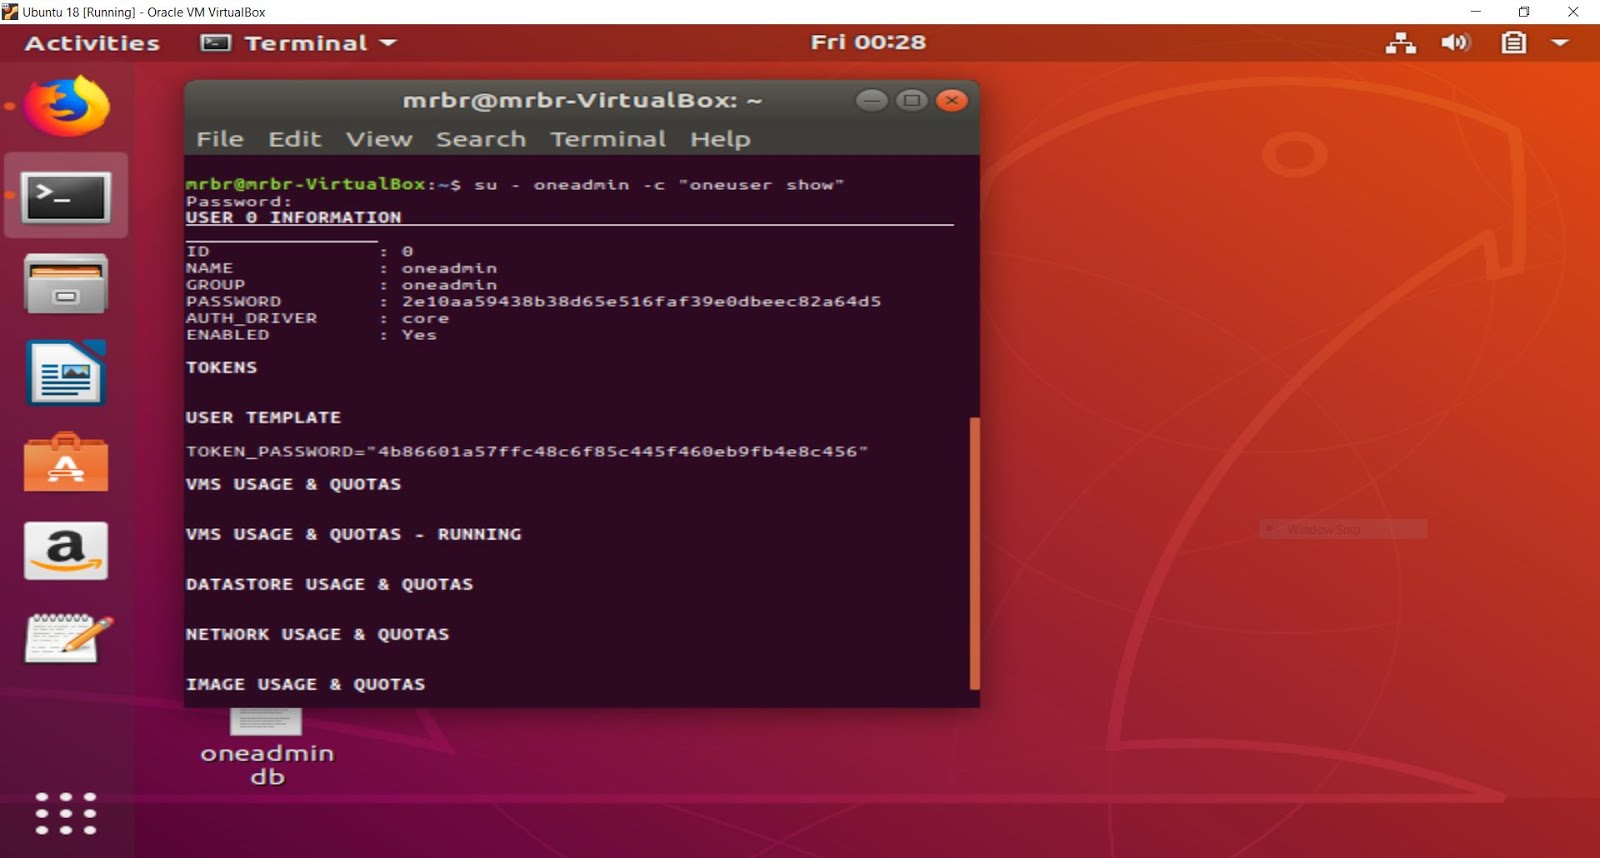
After OpenNebula is started for the first time, you should check that the commands can connect to the OpenNebula daemon. You can do this in the Linux CLI or in the graphical user interface: Sunstone.
Step 7: Sunstone UI
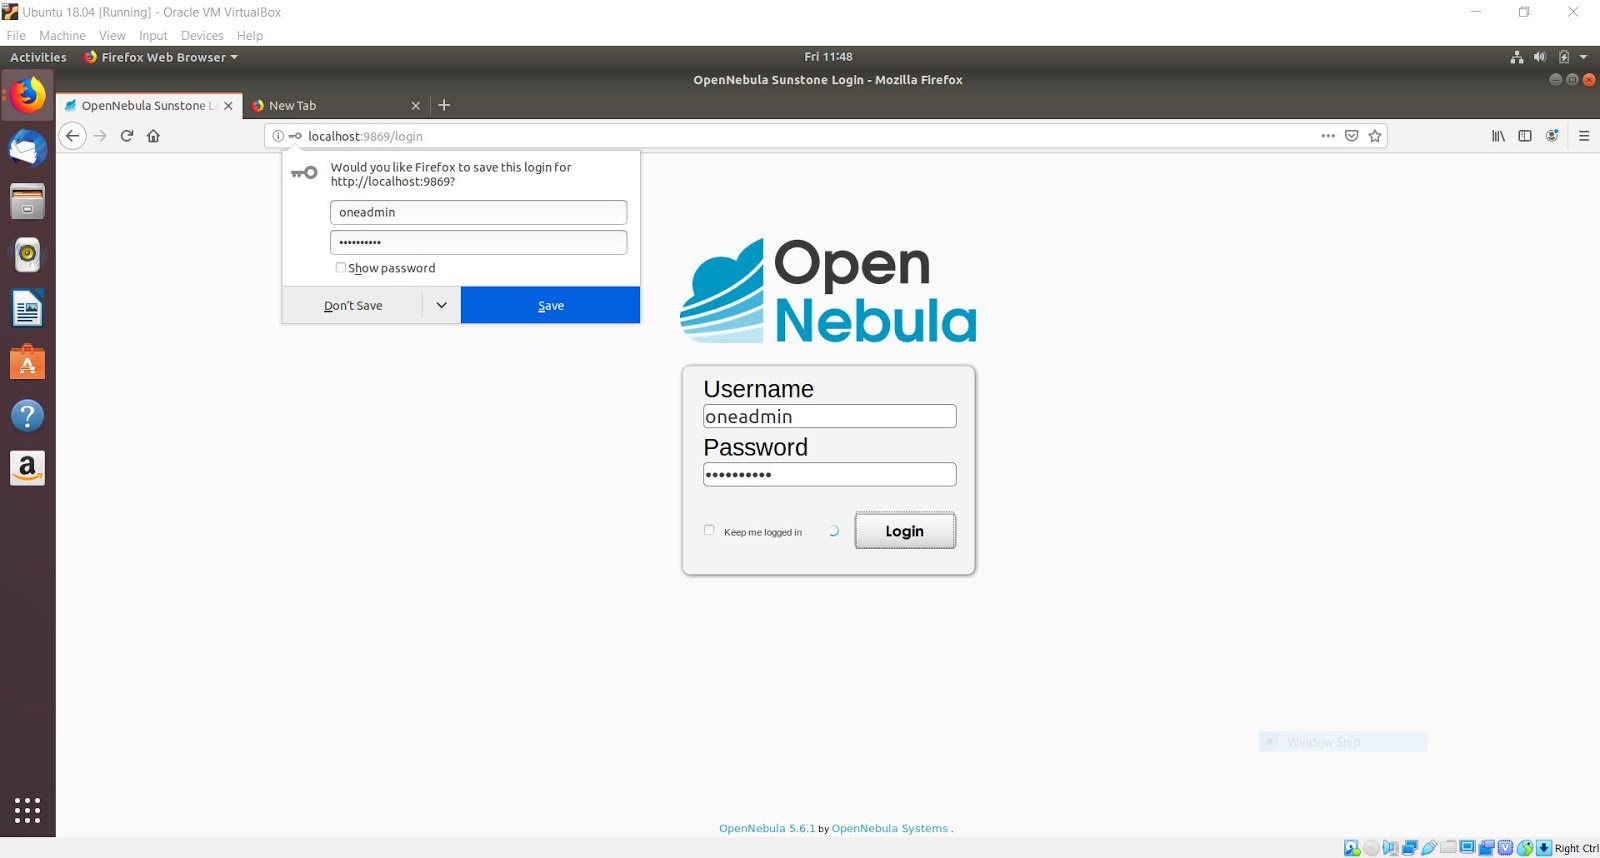
Now you can try to log in into Sunstone web interface. To do this point your browser to
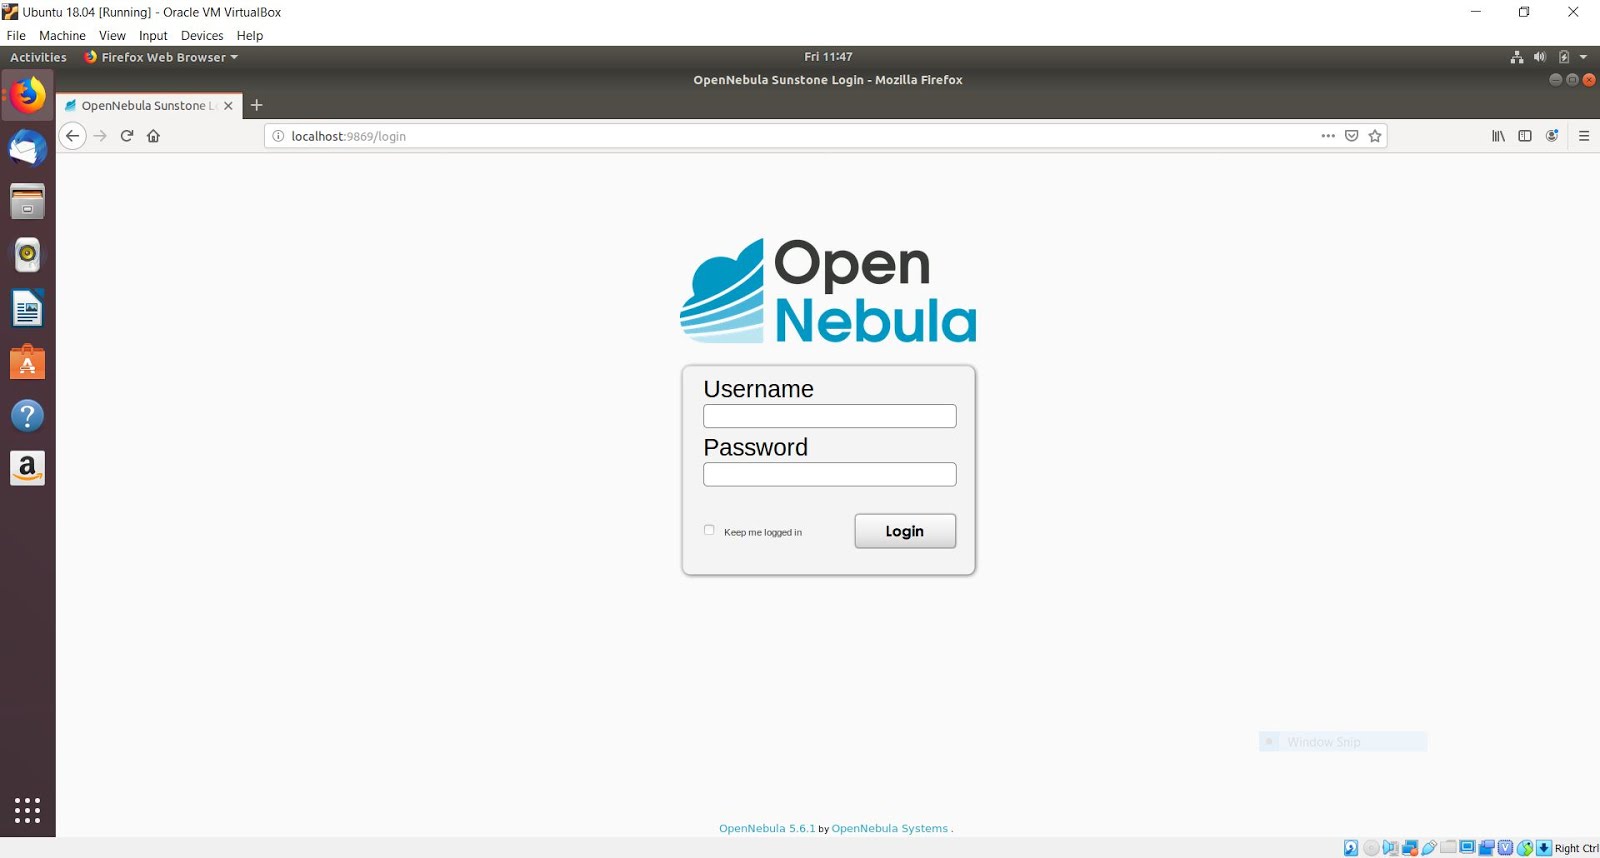
The user is oneadmin and the password is the one in the file /var/lib/one/.one/one_auth in your Front-end.
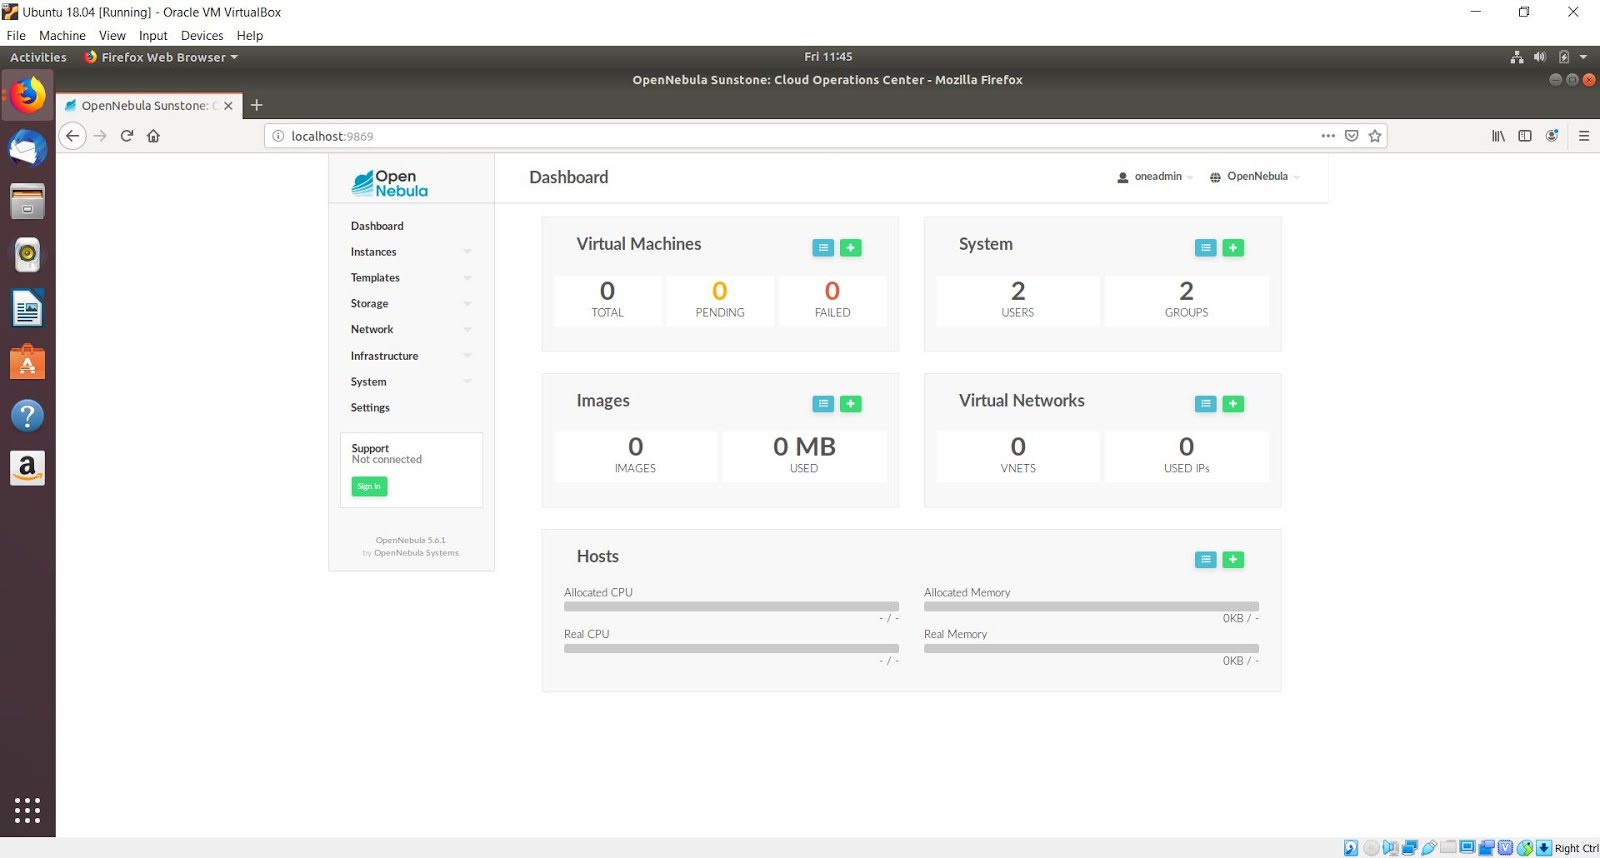
On logging in, you should get a dashboard like below.
If the page does not load, make sure you check /var/log/one/sunstone.log and /var/log/one/sunstone.error. Also, make sure TCP port 9869 is allowed through the firewall.
Finally the Installation of OpenNebula Frontend for Ubuntu 18.04 Completed Successfully. Next OpenNebula KVM Node Installation on Ubuntu 18.04 [ Will Update Soon]
Complete_Reference:
$ sudo ufw allow proto tcp from any to any port 9869

Note: In Some machine while running OpenNebula it will show SSH Port Error. To Set Up a Firewall with UFW Refer the Below Link. [Skip if No Error Occurs ]
Refer: https://www.digitalocean.com/community/tutorials/how-to-set-up-a-firewall-with-ufw-on-ubuntu-16-04
Step 6.4: Start OpenNebula Daemons
You are ready to start the OpenNebula daemons. You can use systemctl for Linux distributions which have adopted systemd:
$ systemctl start opennebula
$ systemctl start opennebula-sunstone
Or$ systemctl start opennebula opennebula-sunstone
$ systemctl enable opennebula opennebula-sunstone
For Example:
Step 6.5: Verify the Installation
After OpenNebula is started for the first time, you should check that the commands can connect to the OpenNebula daemon. You can do this in the Linux CLI or in the graphical user interface: Sunstone.
$ su - oneadmin -c "oneuser show"
For Example:
Step 7: Sunstone UI
Now you can try to log in into Sunstone web interface. To do this point your browser to
http://<frontend_address>:9869
If everything is OK you will be greeted with a login page.
The user is oneadmin and the password is the one in the file /var/lib/one/.one/one_auth in your Front-end.

On logging in, you should get a dashboard like below.

If the page does not load, make sure you check /var/log/one/sunstone.log and /var/log/one/sunstone.error. Also, make sure TCP port 9869 is allowed through the firewall.
Finally the Installation of OpenNebula Frontend for Ubuntu 18.04 Completed Successfully. Next OpenNebula KVM Node Installation on Ubuntu 18.04 [ Will Update Soon]
Complete_Reference:
Nice one bro
ReplyDelete